AWS DevOps Blog
Deploying MongoDB with OpsWorks
AWS OpsWorks is an application management service that makes it easy to deploy and operate applications of all shapes and sizes. OpsWorks uses Chef to install and configure software on Amazon EC2 instances and lets you automate any task that can be scripted. In this blog post, we will show a step-by-step example for how to install MongoDB on Amazon EC2 instances using OpsWorks.
MongoDB is a document-oriented NoSQL database system. While it is easy to get started and install MongoDB, configuring and running a multi-node production environment requires planning. This is where an application management service like OpsWorks can help by automating and simplifying the deployment and the operations involved in running a distributed database on EC2. Because OpsWorks utilizes the Chef framework, instead of starting from scratch, we can leverage the community-built cookbooks that implement some of the best practices out of the box.
For the purposes of this walk-through, we will set up a simple single-node MongoDB environment.
Create Repository
With the latest release, OpsWorks supports Chef 11.10 and Berkshelf. Let’s create a repository that will reference the community cookbook and our own recipes to start:
Using GitHub, create a new repository “MyMongoDB”:

Then create a
Berksfile which will direct OpsWorks to the community cookbooks:
site :opscode cookbook 'mongodb' |
Next, create a folder for your cookbooks. In this example it is named “mongodb-mysite”.

Inside that folder create
metadata.rb:
name "mongodb-mysite" description 'Example cookbook for MongoDB Berkshelf based install' maintainer "MyOrg" license "Apache 2.0" version "1.0.0" depends 'mongodb' |
Then create the recipes folder. Inside the recipes folder create a file
default.rb:
include_recipe "mongodb::10gen_repo" include_recipe "mongodb::default" |
Create Stack
Now you’re ready to create an OpsWorks stack using the
OpsWorks console:
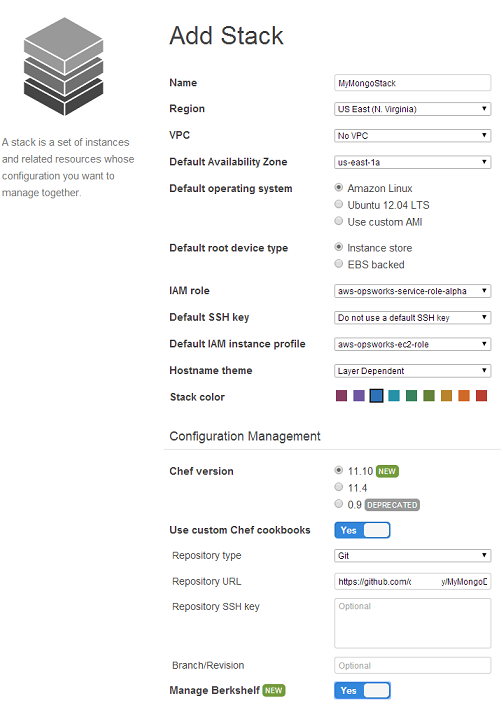
1.
Select
Add a Stack to create an OpsWorks stack.
2.
Select
Ubuntu 12.04 LTS for the default operating system.
3.
Give it a name and select
Advanced.
4.
Set
Use custom Chef Cookbooks to Yes.
5.
Set
Repository type to Git.
6.
Set the
Repository URL to your repository
7.
Set
Manage Berkshelf to Yes.
8.
Click the
Add Stack button at the bottom of the page to create the stack.
Add a Layer
1.
Select
Add Layer.
2.
Choose the
Custom layer, give it a name and shortname. Click Add Layer.
3.
Click the layer’s
edit Recipes action and scroll to the
Custom Chef recipes section. You will notice there are several headings—Setup, Configure, Deploy, Undeploy, and Shutdown—which correspond to OpsWorks lifecycle events. OpsWorks triggers these events at these key points in instance’s lifecycle, which runs the associated recipes.
4.
Enter
mongodb-mysite::default next to Setup, click
+ to add it to the list and click the
Save button at the bottom to save the updated configuration. OpsWorks will then run this recipe whenever you initially boot an instance in this layer.

Add an Instance
The layer just controls how to configure instances. You now need to add some instances to the layer. Click
Instances in the navigation pane and under your custom MongoDB layer, click
+ Instance. For this walkthrough, just accept the default settings and click
Add Instance to add the instance to the layer. Click
start in the row’s Actions column to start the instance. OpsWorks will then launch a new EC2 instance and configure it as a MongoDB server. The instance’s status will change to
online when it’s ready.
Summary
These instructions have demonstrated how to create a single MongoDB instance using the community cookbooks. See the
community cookbooks for information about advanced options such as sharding the database to use OpsWorks automatic instance scaling.