AWS DevOps & Developer Productivity Blog
Set up a build pipeline with Jenkins and Amazon ECS
My colleague Daniele Stroppa sent a nice guest post that demonstrates how to use Jenkins to build Docker images for Amazon EC2 Container Service.
—–
In this walkthrough, we’ll show you how to set up and configure a build pipeline using Jenkins and the
Amazon EC2 Container Service (ECS).
We’ll be using a sample Python application, available on
GitHub. The repository contains a simple Dockerfile that uses a python base image and runs our application:
FROM python:2-onbuild
CMD [ "python", "./application.py" ]
This Dockerfile is used by the build pipeline to create a new Docker image upon pushing code to the repository. The built image will then be used to start a new service on an ECS cluster.
For the purpose of this walkthrough,
fork the py-flask-signup-docker repository to your account.
Setup the build environment
For our build environment we’ll launch an Amazon EC2 instance using the Amazon Linux AMI and install and configure the required packages. Make sure that the security group you select for your instance allows traffic on ports TCP/22 and TCP/80.
Install and configure Jenkins, Docker and Nginx
Connect to your instance using your private key and switch to the root user. First, let’s update the repositories and install Docker, Nginx and Git.
# yum update -y
# yum install -y docker nginx git
To install Jenkins on Amazon Linux, we need to add the Jenkins repository and install Jenkins from there.
# wget -O /etc/yum.repos.d/jenkins.repo http://pkg.jenkins-ci.org/redhat/jenkins.repo
# rpm --import http://pkg.jenkins-ci.org/redhat/jenkins-ci.org.key
# yum install jenkins
As Jenkins typically uses port TCP/8080, we’ll configure Nginx as a proxy. Edit the Nginx config file (/etc/nginx/nginx.conf) and change the server configuration to look like this:
server {
    listen       80;
    server_name  _;

    location / {
            proxy_pass http://127.0.0.1:8080;
    }
}
We’ll be using Jenkins to build our Docker images, so we need to
add the
jenkins user to the
docker group. A reboot may be required for the changes to take effect.
# usermod -a -G docker jenkins
Start the Docker, Jenkins and Nginx services and make sure they will be running after a reboot:
# service docker start
# service jenkins start
# service nginx start
# chkconfig docker on
# chkconfig jenkins on
# chkconfig nginx on
You can launch the Jenkins instance complete with all the required plugins with
this CloudFormation template.
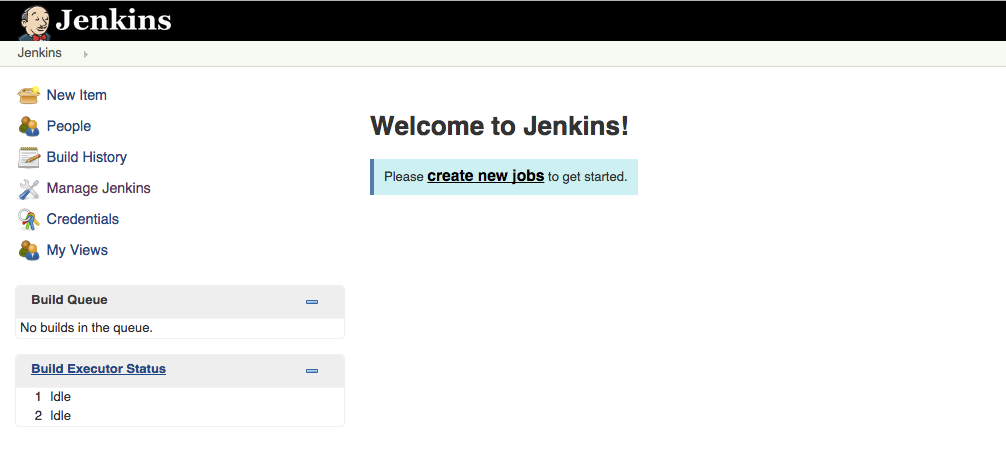
Point your browser to the public DNS name of your EC2 instance (e.g. ec2-54-163-4-211.compute-1.amazonaws.com) and you should be able to see the Jenkins home page:
The Jenkins installation is currently accessible through the Internet without any form of authentication. Before proceeding to the next step, let’s secure Jenkins. Select
Manage Jenkins on the Jenkins home page, click
Configure Global Security and then enable Jenkins security by selecting the
Enable Security checkbox.
For the purpose of this walkthrough, select
Jenkins’s Own User Database under
Security realm and make sure to select the
Allow users to sign up checkbox. Under
Authorization, select
Matrix-based security. Add a user (e.g. admin) and provide necessary privileges to this user.
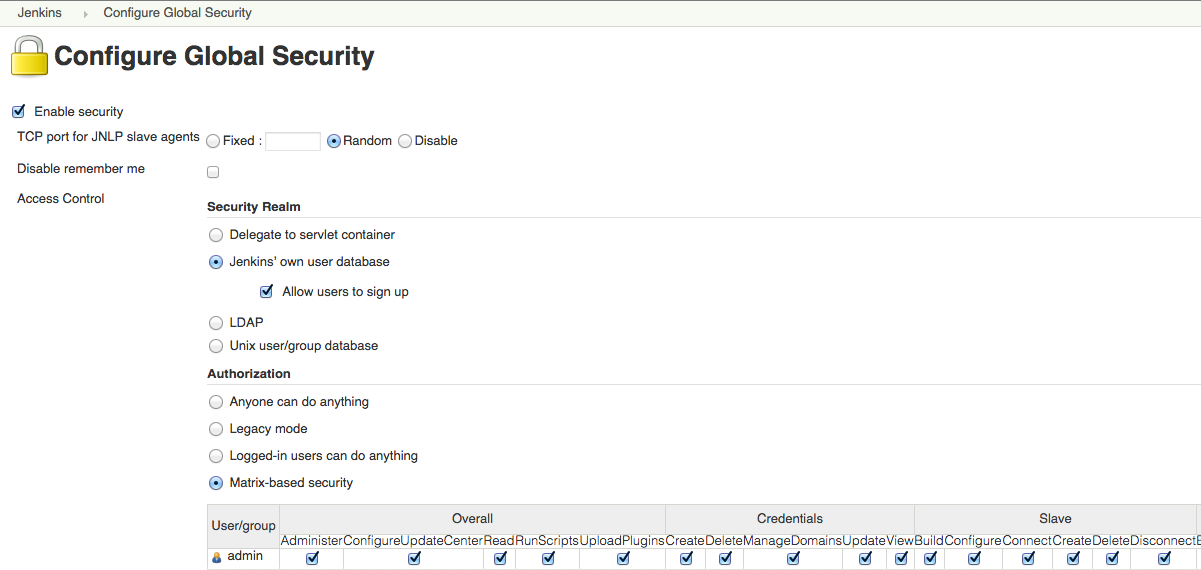
After that’s complete, save your changes. Now you will be asked to provide a username and password for the user to login. Click on
Create an account, provide your username – i.e. admin – and fill in the user details. Now you will be able to log in securely to Jenkins.
Install and configure Jenkins plugins
The last step in setting up our build environment is to install and configure the Jenkins plugins required to build a Docker image and publish it to a Docker registry (DockerHub in our case). We’ll also need a plugin to interact with the code repository of our choice, GitHub in our case.
From the Jenkins dashboard select
Manage Jenkins and click
Manage Plugins. On the
Available tab, search for and select the following plugins:
Then click the
Install button. After the plugin installation is completed, select
Manage Jenkins from the Jenkins dashboard and click
Configure System. Look for the
Docker Image Builder section and fill in your Docker registry (DockerHub) credentials:

Install and configure the Amazon ECS CLI
Now we are ready to setup and configure the ECS Command Line Interface (CLI). The sample application creates and uses an
Amazon DynamoDB table to store signup information, so make sure that the IAM Role that you create for the EC2 instances allows the
dynamodb:* action.
Follow the
Setting Up with Amazon ECS guide to get ready to use ECS. If you haven’t done so yet, make sure to start
at least one container instance in your account and create the Amazon ECS service role in the AWS IAM console.
Make sure that Jenkins is able to use the ECS CLI. Switch to the
jenkins user and configure the AWS CLI, providing your credentials:
# sudo -su jenkins
> aws configure
Login to Docker Hub
The Jenkins user needs to login to Docker Hub before doing the first build:
# docker login
Create a task definition template
Create a task definition template for our application (note, you will replace the image name with your own repository):
{
    "family": "flask-signup",
    "containerDefinitions": [
        {
            "image": "your-repository/flask-signup:v_%BUILD_NUMBER%",
            "name": "flask-signup",
            "cpu": 10,
            "memory": 256,
            "essential": true,
            "portMappings": [
                {
                    "containerPort": 5000,
                    "hostPort": 80
                }
            ]
        }
    ]
}
Save your task definition template as
flask-signup.json. Since the image specified in the task definition template will be built in the Jenkins job, at this point we will create a
dummy task definition. Substitute the %BUILD_NUMBER% parameter in your task definition template with a non-existent value (0) and
register it with ECS:
# sed -e "s;%BUILD_NUMBER%;0;g" flask-signup.json > flask-signup-v_0.json
# aws ecs register-task-definition --cli-input-json file://flask-signup-v_0.json
{
"taskDefinition": {
    "volumes": [],
    "taskDefinitionArn": "arn:aws:ecs:us-east-1:123456789012:task-definition/flask-signup:1",
    "containerDefinitions": [
        {
            "name": "flask-signup",
            "image": "your-repository/flask-signup:v_0",
            "cpu": 10,
            "portMappings": [
                {
                    "containerPort": 5000,
                    "hostPort": 80
                }
            ],
            "memory": 256,
            "essential": true
        }
    ],
    "family": "flask-signup",
    "revision": 1
}
}
Make note of the family value (
flask-signup), as it will be needed when configuring the
Execute shell step in the Jenkins job.
Create the ECS IAM Role, an ELB and your service definition
Create a new IAM role (e.g. ecs-service-role), select the Amazon EC2 Container Service Role type and attach the AmazonEC2ContainerServiceRole policy. This will allows ECS to create and manage AWS resources, such as an ELB, on your behalf.
Create an Amazon Elastic Load Balancing (ELB) load balancer to be used in your service definition and note the ELB name (e.g. elb-flask-signup-1985465812).
Create the flask-signup-service service, specifying the task definition (e.g. flask-signup) and the ELB name (e.g. elb-flask-signup-1985465812):
# aws ecs create-service --cluster default --service-name flask-signup-service --task-definition flask-signup --load-balancers loadBalancerName=elb-flask-signup-1985465812,containerName=flask-signup,containerPort=5000 --role ecs-service-role --desired-count 0
{
    "service": {
        "status": "ACTIVE",
        "taskDefinition": "arn:aws:ecs:us-east-1:123456789012:task-definition/flask-signup:1",
        "desiredCount": 0,
        "serviceName": "flask-signup-service",
        "clusterArn": "arn:aws:ecs:us-east-1:123456789012:cluster/default",
        "serviceArn": "arn:aws:ecs:us-east-1:123456789012:service/flask-signup-service",
        "runningCount": 0
    }
}
Since we have not yet build a Docker image for our task, make sure to set the –desired-count flag to 0.
Configure the Jenkins build
On the Jenkins dashboard, click on
New Item, select the
Freestyle project job, add a name for the job, and click
OK. Configure the Jenkins job:
- Under GitHub Project, add the path of your GitHub repository – e.g. https://github.com/awslabs/py-flask-signup-docker. In addition to the application source code, the repository contains the Dockerfile used to build the image, as explained at the beginning of this walkthrough.
-
Under Source Code Management provide the Repository URL for Git, e.g. https://github.com/awslabs/py-flask-signup-docker.
-
In the Build Triggers section, select Build when a change is pushed to GitHub.
-
In the Build section, add a Docker build and publish step to the job and configure it to publish to your Docker registry repository (e.g. DockerHub) and add a tag to identify the image (e.g. v_$BUILD_NUMBER).
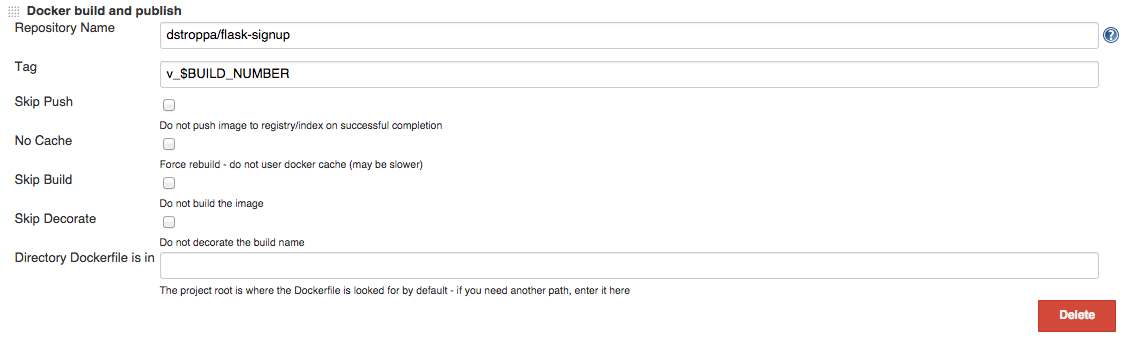
The
Repository Name specifies the name of the Docker repository where the image will be published; this is composed of a user name (dstroppa) and an image name (flask-signup). In our case, the Dockerfile sits in the root path of our repository, so we won’t specify any path in the
Directory Dockerfile is in field. Note, the repository name needs to be the same as what is used in the task definition template in flask-signup.json.
- Add a Execute Shell step and add the ECS CLI commands to start a new task on your ECS cluster.

The script for the Execute shell step will look like this:
#!/bin/bash
SERVICE_NAME="flask-signup-service"
IMAGE_VERSION="v_"${BUILD_NUMBER}
TASK_FAMILY="flask-signup"

# Create a new task definition for this build
sed -e "s;%BUILD_NUMBER%;${BUILD_NUMBER};g" flask-signup.json > flask-signup-v_${BUILD_NUMBER}.json
aws ecs register-task-definition --family flask-signup --cli-input-json file://flask-signup-v_${BUILD_NUMBER}.json

# Update the service with the new task definition and desired count
TASK_REVISION=`aws ecs describe-task-definition --task-definition flask-signup | egrep "revision" | tr "/" " " | awk '{print $2}' | sed 's/"$//'`
DESIRED_COUNT=`aws ecs describe-services --services ${SERVICE_NAME} | egrep "desiredCount" | tr "/" " " | awk '{print $2}' | sed 's/,$//'`
if [ ${DESIRED_COUNT} = "0" ]; then
    DESIRED_COUNT="1"
fi

aws ecs update-service --cluster default --service ${SERVICE_NAME} --task-definition ${TASK_FAMILY}:${TASK_REVISION} --desired-count ${DESIRED_COUNT}
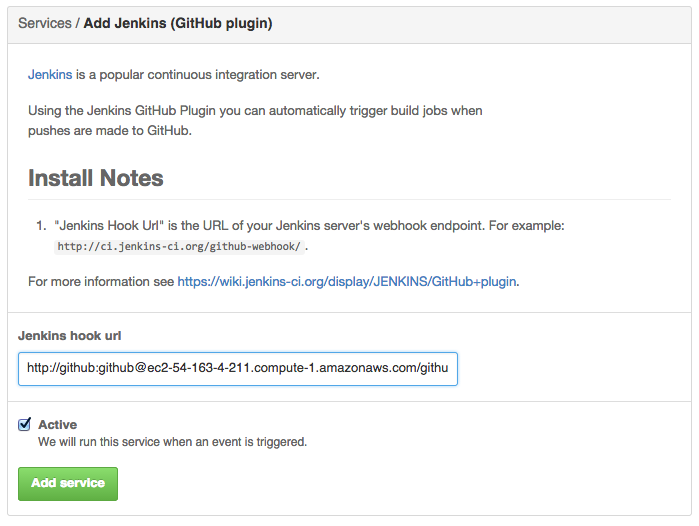
To trigger the build process on Jenkins upon pushing to the GitHub repository we need to configure a service hook on GitHub. Go to the GitHub repository settings page, select
Webhooks and Services and add a service hook for
Jenkins (GitHub plugin). Add the
Jenkins hook url: http://<username>:<password>@<EC2-DNS-Name>/github-webhook/.
Now we have configured a Jenkins job in such a way that whenever a change is committed to GitHub repository it will trigger the build process on Jenkins.
Happy building
From your local repository, push the application code to GitHub:
# git add *
# git commit -m "Kicking off Jenkins build"
# git push origin master
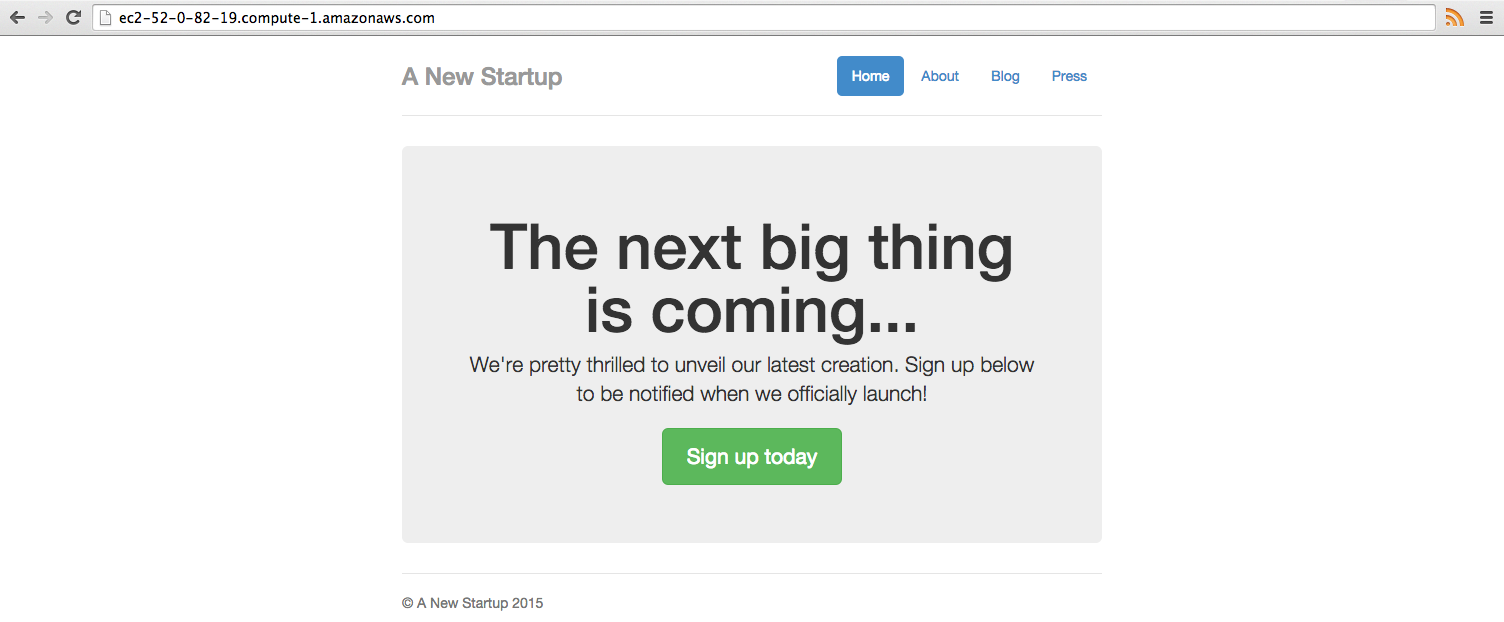
This will trigger the Jenkins job. After the job is completed, point your browser to the public DNS name for your EC2 container instance and verify that the application is correctly running:
Conclusion
In this walkthrough we demonstrated how to use Jenkins to automate the deployment of an ECS service. See
the documentation for further information on Amazon ECS.